
|
|
[Home] [Search] [FAQ] |
|---|---|
| [Private Message] [Register] [Profile] [Member list] [Log-in] |
| Who's Online: |
| There are 0 member(s), and 1 guest(s) online. |
| [Printable Version] [Post Reply] |
| Author | Message |
|---|---|
|
Anon Deleted Posts : Location : Status : Offline |
1979 CF Ambulance Camper - wiper probs, new MOT! Ok, I'll kick things off.Unfortunately I don't have nearly as many photos of the work I did as I'd like. I tend to just get on with things rather than take pictures! Anyway, this is what I have: I bought it as a "no MOT, just needs a couple of small plates welding behind the headlamps" sort of a project. 2 years later it was on the road after a slight weldathon, new shocks all round ripping out 4 miles of badly wired spaghetti to some crappy lights and a lick of paint. It's the 2.3 slant engined flavour. THe interior was mostly there but I added an Eberspacher heater, fridge, double hob with oven and wired up the leisure battery properly! I also improved the frankly dangerous mains wiring by adding a zig unit sort of thing and re-plumbed the gas. Anyhow some photos: 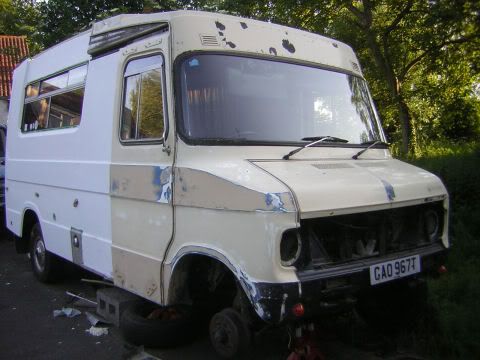
The nearest I've got to a "before" shot, although I'd already started stripping it. Now some "slight welding for MOT required"! 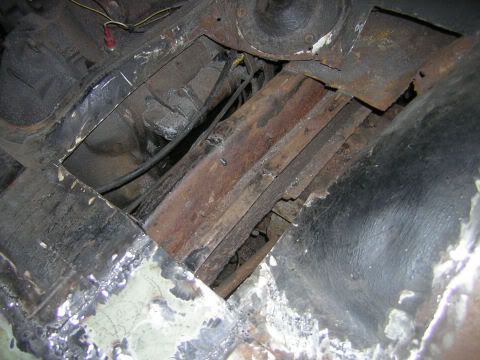
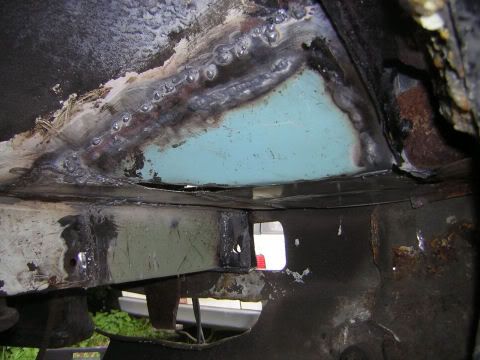
The blue bit is actually a bit of Mk1 Ford Transit! 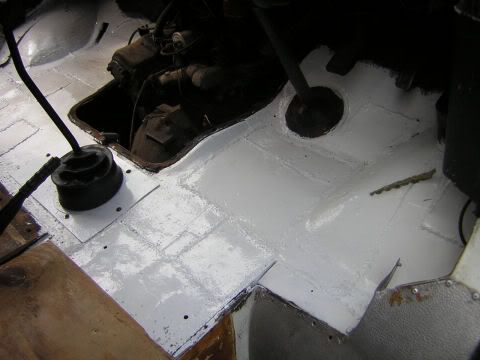
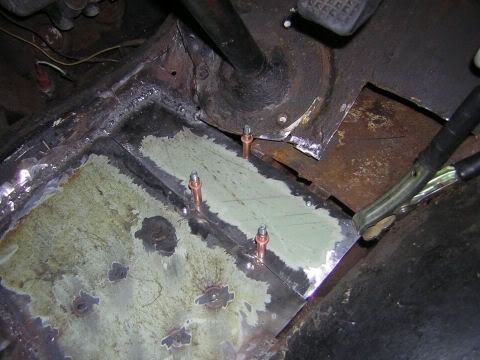
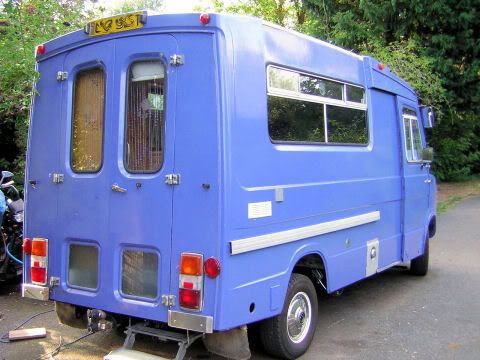
A bit of Hammerite works wonders! This is it after passing the MOT first time! 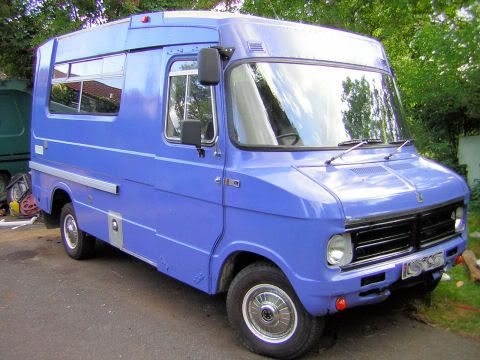
Inside: 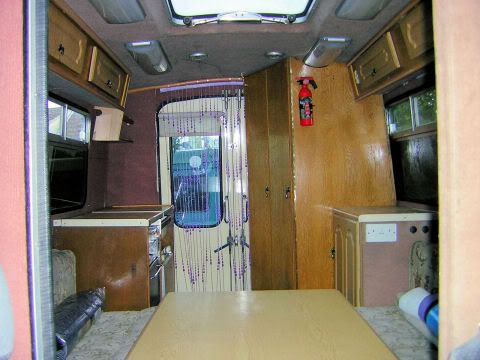
There's been a few more mods: I fitted LPG so I can afford to drive it more than 100 yards! There's a double coach seat in the front (for the dogs!) and I have an ex-Calibra leather seat for the drivers side. I got some chrome bumpers for the front. I have also fitted Bosch electronic ignition from the later CF. It originally had a Lumenition type thing but made by AC Delco but I manged to fry that by connecting it up the wrong way after it's lay up ( ::) I replaced all 4 wishbones and ball joints this summer as the bushes were gone and a couple of ball joints were past it too. Did the track rod ends too while I was at it. A good old bus that got us from Somerset to the Isle of Gigha (W Coast of Scotland) and back this summer. I'll keep you updated with any more work as it happens. ---------------------- |
 Wed 13 Feb 2008 @ 20:47 Wed 13 Feb 2008 @ 20:47
|    |
|
Anon Deleted Posts : Location : Status : Offline |
RE: LPG conversion. . . who, where & how much? someone mentioned around the £2k mark when i enquired about my V6. does that sound right? p.s. great blog! Wish i'd seen more of the in-between stages :) ---------------------- |
Mon 18 Feb 2008 @ 04:13
| |
|
Anon Deleted Posts : Location : Status : Offline |
In before the lock! (you're not meant to reply to blogs or stick in ebay ads!!) LPG bought off ebay for £350 ish (new)last summer and fitted by me. Bought a couple of extra bits (flexible hose from tank to carb as it's easier to run than copper)so I suppose the whole thing was less than £400 to fit plus 2 or 3 days to do it. It was actually one of these http://cgi.ebay.co.uk/Bedford-CF-Camper-carburetor-Autogas-Lpg-Conversion-Kit_W0QQitemZ220124048261 but it definitely cost less than that! Mine was simpler to fit as it's carb so no need to mess with emulators and the like that you'd need for injection (not sure what your engine is). 2k sounds a lot even when paying for labour but maybe that's the going rate now. Wish I'd taken more interim photos but as I say I tended to just get on with it rather than photograph everything so these are all I have! Took about 2 years on and off to get it done. ---------------------- |
Mon 18 Feb 2008 @ 15:59
| |
|
Anon Deleted Posts : Location : Status : Offline |
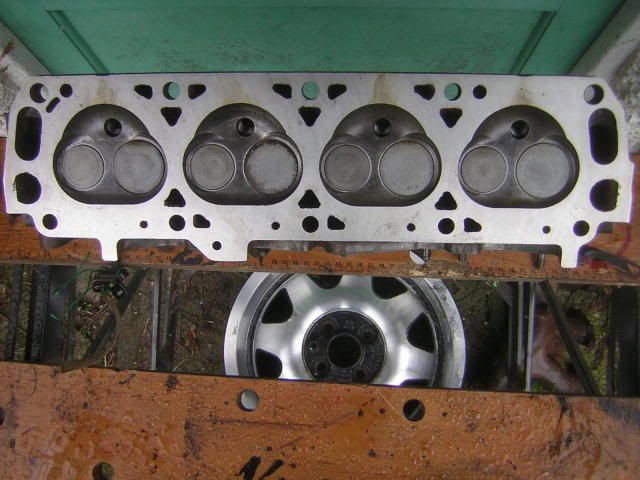
Finally, more work on the CF! Last April (yes 2008!) the head gasket went en-route to Derbyshire which resulted in us making it no further than Hopwood Services and getting a tow home. The van has pretty much languished on the drive ever since. I did strip the engine down about a year ago but that was about it: 
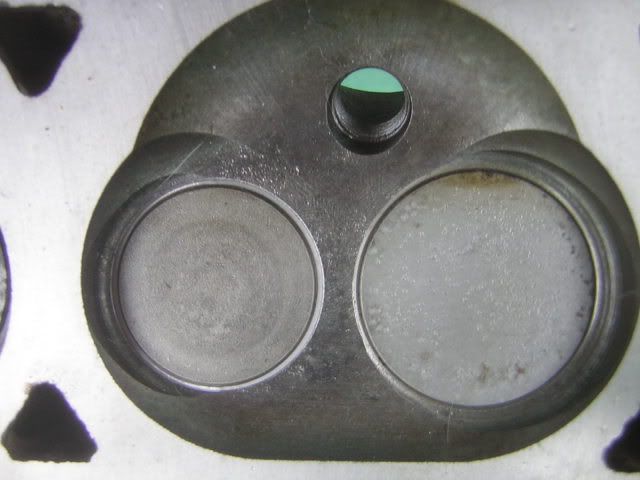
I finally got the head sorted in March this year. About £300  got it stripped, unleaded valve seat inserts fitted, cleaned up, skimmed and reassembled. Work was carried out by Thomas Hamlins in Bridgwater. Not the cheapest maybe but they've a good reputation. got it stripped, unleaded valve seat inserts fitted, cleaned up, skimmed and reassembled. Work was carried out by Thomas Hamlins in Bridgwater. Not the cheapest maybe but they've a good reputation.
Around the same time I decided the exhaust manifold could do with a lick of paint, I couldn't put some rusty old piece back on that head now could I! Green Gak applied to remove the rust 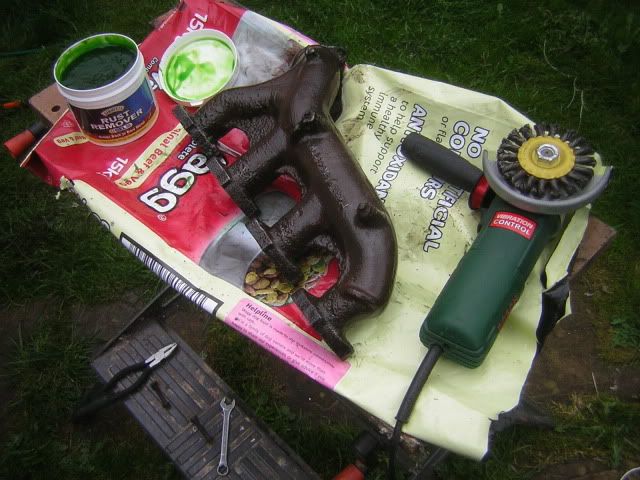
And after a few coats of High temp paint. 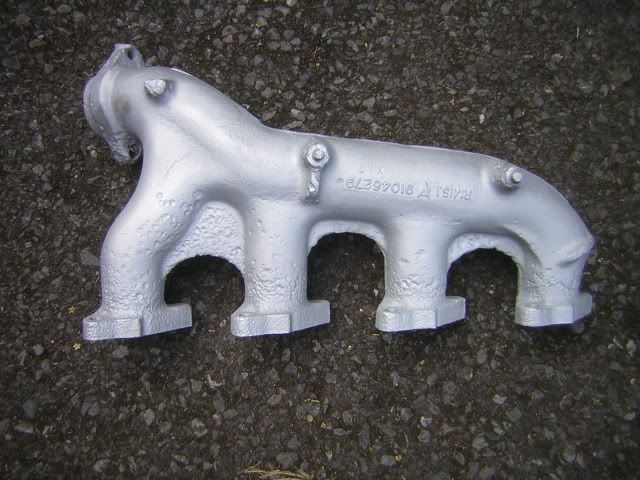
Not much happened then until today. Started to make steps towards reassembling the engine. One of the engine mounts was in a sorry state from years of oil dripping on it, it was swollen up and a bit soft. I'd got a new pair from Ebay so having the engine apart was a good opportunity to change them. Simply undid the bolts and jacked the engine up with a hefty piece of wood under the sump to spread the load. This is the dodgy one, it had swollen so much I could hardly get at the mounting bolts. It fell apart while I was pulling it out. 
And the new one: 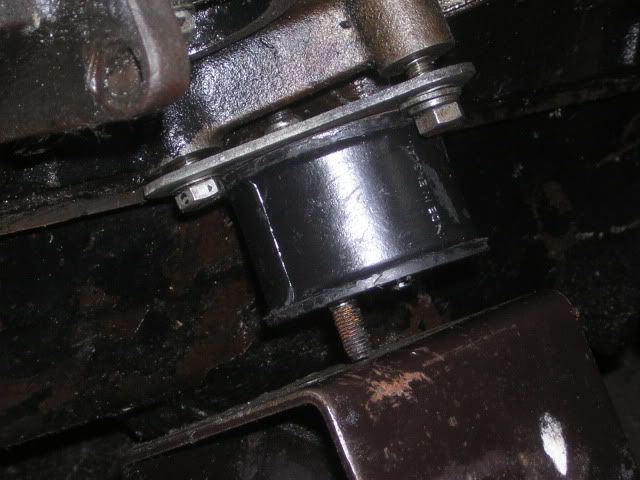
Did the other one too so that they're matched although the old one was OK really so I'll keep it as a spare. Old 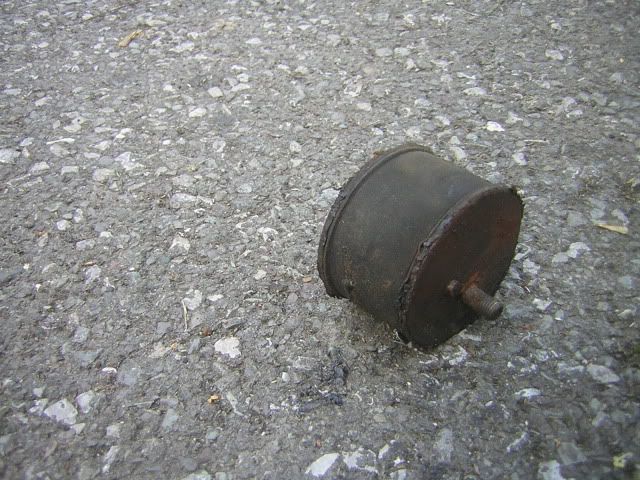
New 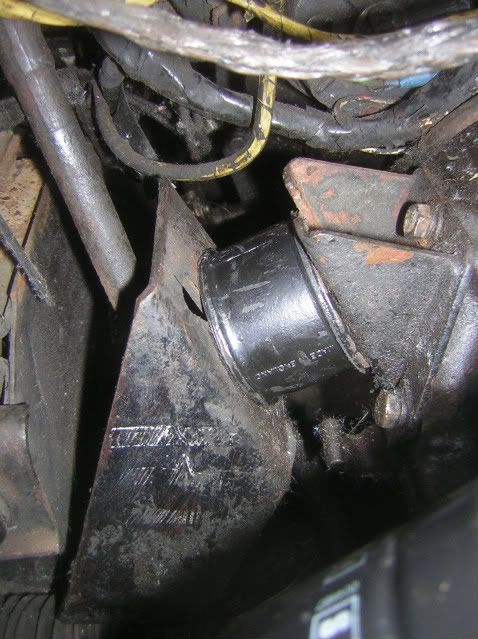
That's as far as I got today, I was doing it in between sorting my Golf out (fighting rust, new suspension & Goodridge brake hoses today!) 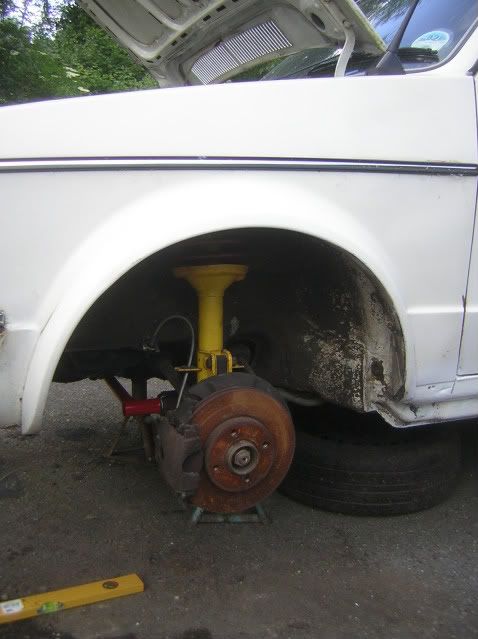

I need it (and the van)on the road before the summer goes! Going to be a busy week,got these arriving on Thursday: 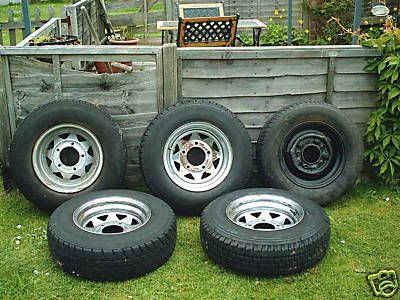
A bit less than £30 each including courier. They'll need a bit of a sorting out but still a bargain I reckon! ---------------------- |
Tue 09 Jun 2009 @ 23:31
| |
|
Anon Deleted Posts : Location : Status : Offline |
Everything is looking really good so far so good luck with the rest. Just had my head fitted with the hardened seats - well actually had to get a replacement head as my original was cracked - and paid similar to yourself. However, when my mechanic put the head and cam back on to adjust the tappets he didn't measure the valve stem heights which turned out to be a little too long on some. The head had to come off again and the valve stems skimmed at the machine shop. Still a WIP but should be finished soon. 
---------------------- |
Wed 10 Jun 2009 @ 12:30
| |
|
Anon Deleted Posts : Location : Status : Offline |
Dubzi wrote: The van has pretty much languished on the drive ever since. I did strip the engine down about a year ago but that was about it:
Before fitting the head, put some oil in the sump via the front oil return passage in the block and whizz the auxiliary pulley round to prime the oil pump. Then check that oil passes freely through the restrictor that sits proud of the block face. There's nowt worse than finding out after the head is on that the restrictor is blocked... When the cam housing is fitted check again to make sure all 4 housing drillings are clear. The distributor could benefit from a bit of oil in the top of the mainshaft under the rotor arm and also via the hole just above the lower bearing - remove distributor, sit it upside-down & keep adding oil until the felt inside won't take any more. This will keep the top bearing lubricated; on the CF the Bosch distributor top bearing tends to run dry if the distributor is fitted with the oil hole not facing the auxiliary shaft (& thus the squirt hole in the top of the oil pump). Looking good so far: nice work. ---------------------- |
Wed 10 Jun 2009 @ 13:04
| |
|
Anon Deleted Posts : Location : Status : Offline |
philbradshaw wrote: - remove distributor, That's the easy bit. Next comes "set aside an entire day trying to get the bloody thing to mesh with the auxilliary shaft in such a way that the timing can axtually be put right!" Ta for the other advice, gave everything a thorough clean before reassembly - photos soon! ;] ---------------------- |
Wed 10 Jun 2009 @ 16:21
| |
|
Anon Deleted Posts : Location : Status : Offline |
Right, Reassembly! Head on and torqued in the correct sequence. No going back now..... 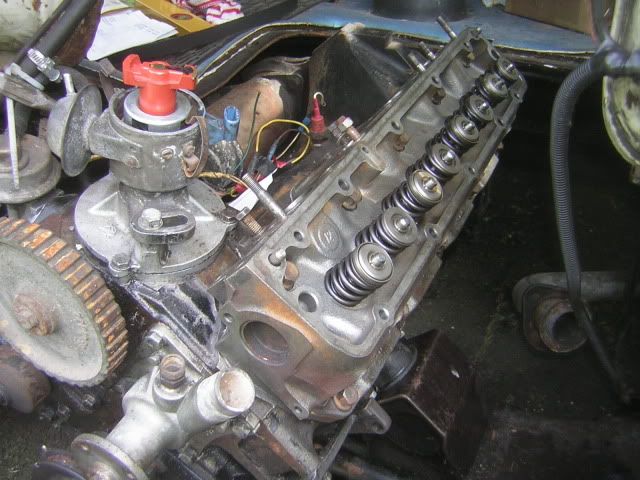
Had to go and get new bolts for the exhaust manifold, 5/16 UNC for future reference. 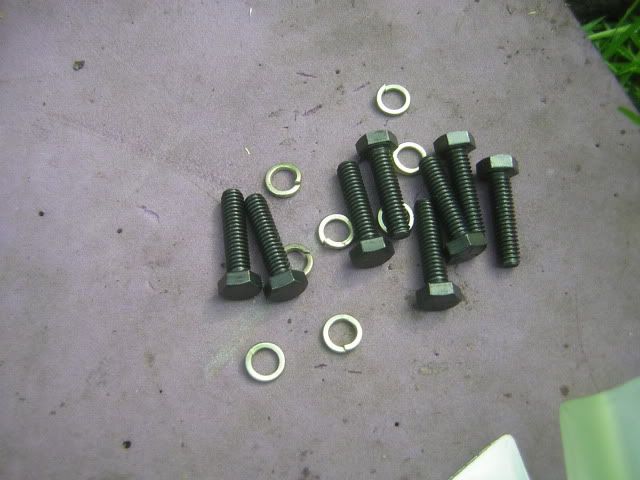
Newly repainted manifold and nice shiny gasket/ heatshield. The edges of it are sharp and cut fingers nicely. I can see that becoming a hazard of spark plug changing on top of 3rd degree burns 
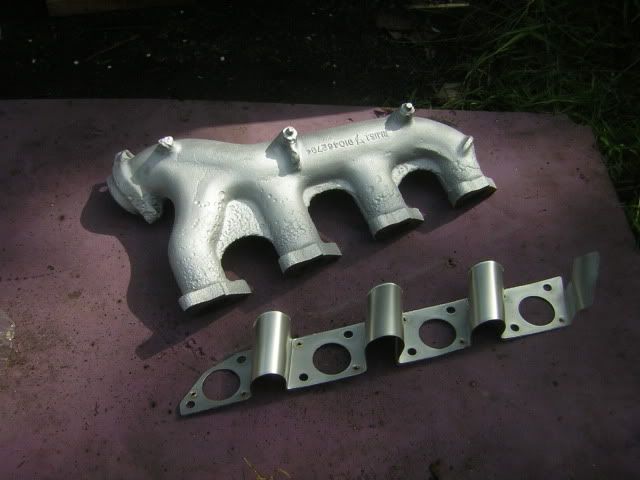
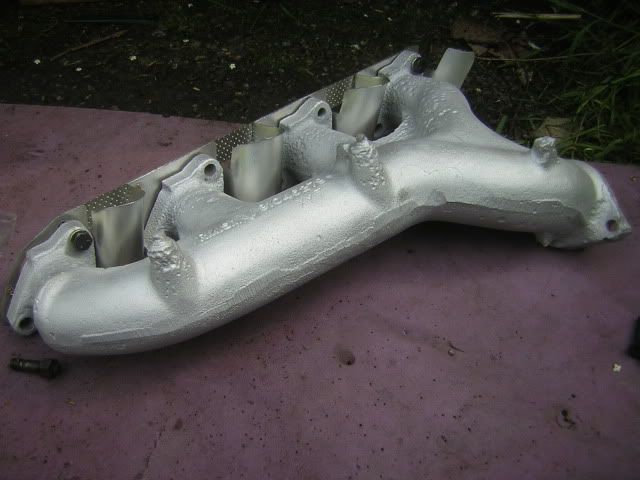
And here's the 2 manifolds attached. 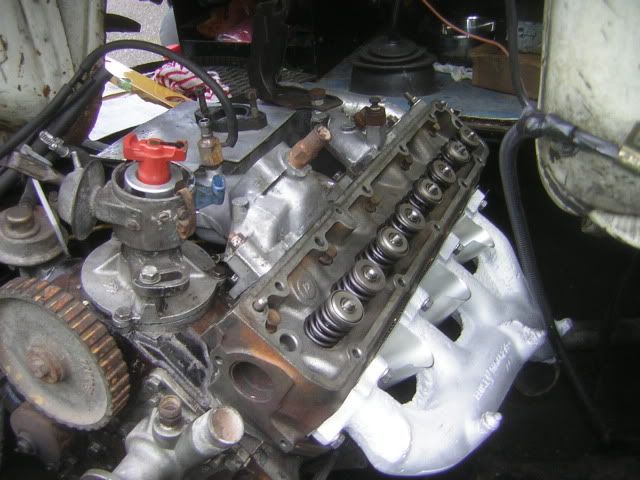
Cam carrier tomorrow, now where did I put those tappets? 
---------------------- |
Wed 10 Jun 2009 @ 18:17
| |
|
Anon Deleted Posts : Location : Status : Offline |
Great! Thats what mine looks like at the mo. I can't wait to hear what it sounds like when it runs. After so long misfiring and I found out I'd put the leads on the dizzy the wrong way it will be amazing to hear what it 'should' sound like. ---------------------- |
Thu 11 Jun 2009 @ 07:27
| |
|
Anon Deleted Posts : Location : Status : Offline |
Dubzi wrote: philbradshaw wrote:
- remove distributor, That's the easy bit. Next comes "set aside an entire day trying to get the bloody thing to mesh with the auxilliary shaft in such a way that the timing can axtually be put right!" ;] It's getting the oil pump drive peg to line up that entails a few goes at getting the distributor to drop in; it gets easier after doing it ---------------------- |
Thu 11 Jun 2009 @ 08:00
| |
|
Anon Deleted Posts : Location : Status : Offline |
Today was mainly spent messing with the Golf which actually started now it's got petrol in the tank rather than water! Just as an aside, this is what first came out of the tank when I drained it... 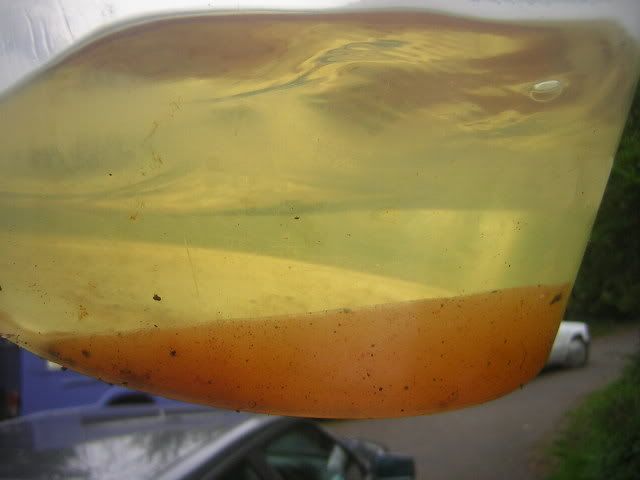
I keep seeing posts on this forum saying "maybe you're dragging crud from the tank into the carb". This is what they mean! The water and crud in the bottom had actually rusted the internals of my electronic fuel pump. When I disconnected it all that came out was brown water. Anyway back to Bedfords..... Cam carrier went on today. New gasket in place. 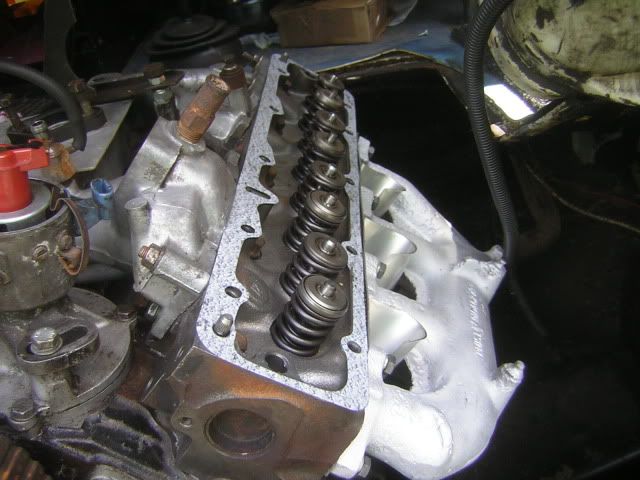
I'm also using some loctite flange sealant on this too as this gasket leaked as long as I've owned the van. Caused the engine mount problem above and lots of smoke as oil burnt off the exhaust manifold when you first started it. Sometimes I think the use of modern materials on old vehicles can be appropriate. On past experience of this stuff I could probably have not used the gasket. It's way better than that blue hylomar gak! 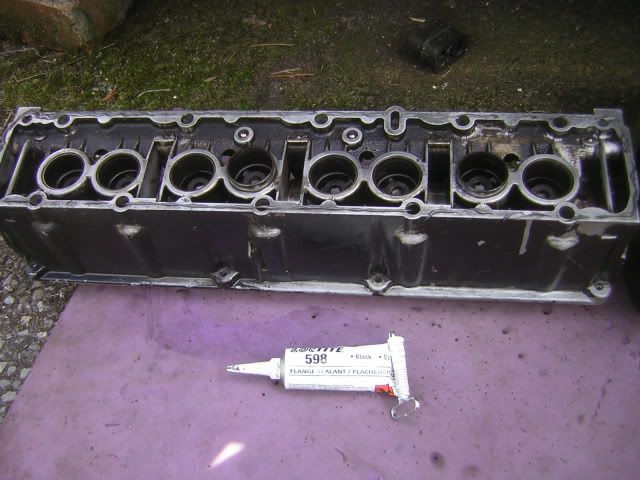
And finally in place with all the bolts tightened. 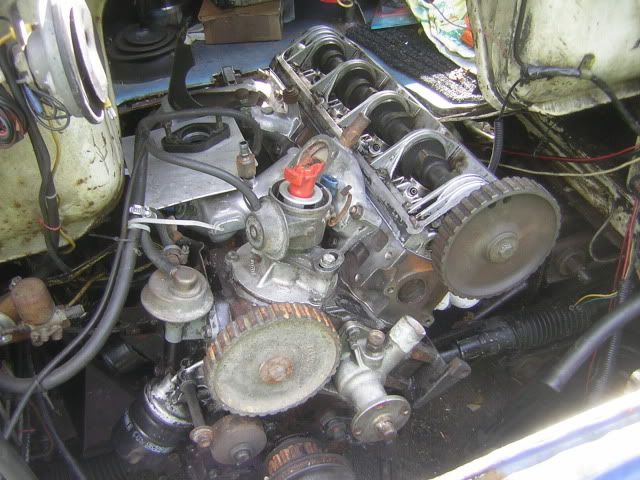
Which is when I found the tappets in a box in the shed....... Just kidding, they were oiled and inplace in the 2nd picture. Refitted the thermostat and housing too. 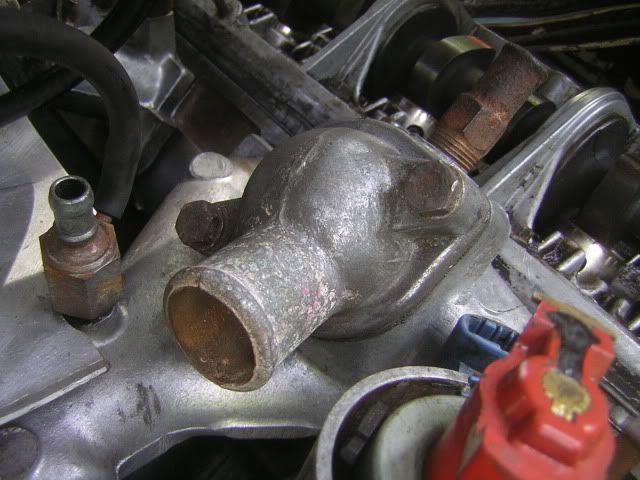
A good tip when tightening the stat housing is to do the nuts up finger tight and then gradually tighten each one 1/4 of a turn at a time to keep things even. Learned this on an old Hillman when I did one side up too tight and cracked it when I started doing up the other side! Next job is to clean up and paint the rocker cover. Might also need to get the hammer and dollies out on the mating flange as it's looking a bit bent around the bolt holes. Last thing I want is oil everywhere! ---------------------- |
Thu 11 Jun 2009 @ 22:31
| |
|
Anon Deleted Posts : Location : Status : Offline |
Forgot to add, the Wellers turned up today. They're chrome but someone's attacked them with an angle grinder by the looks of things! They'll need painting as rechroming isn't an option but not sure what colour. Silver? White? Matt black with red pinstriping? Anyone got any ideas? ---------------------- |
Thu 11 Jun 2009 @ 22:36
| |
|
Anon Deleted Posts : Location : Status : Offline |
Cam housing without gasket works well provided the glue is stable above 200C; I can't remember what I used last Century (!) once I discovered it worked (paper gasket disintegrates over time) but these days there's a lot more choice; Loctite 598 is fine. Hylomar blue is good for stuff that does come apart more often; it cleans off fairly easily. ---------------------- |
Thu 11 Jun 2009 @ 22:42
| |
|
Anon Deleted Posts : Location : Status : Offline |
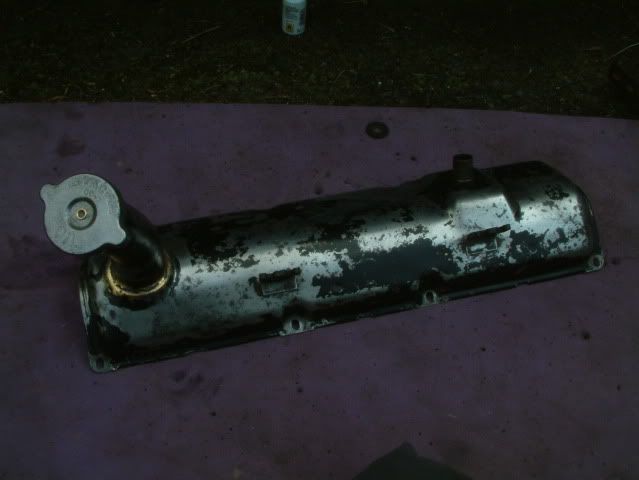
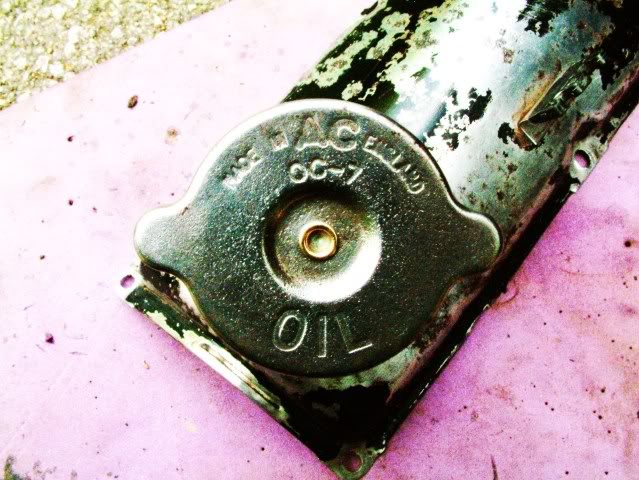
Last few bits. I started cleaning up the Cam cover to repaint it when I realised I actually liked the ratty and patina-ed look of it, so I polished it instead! 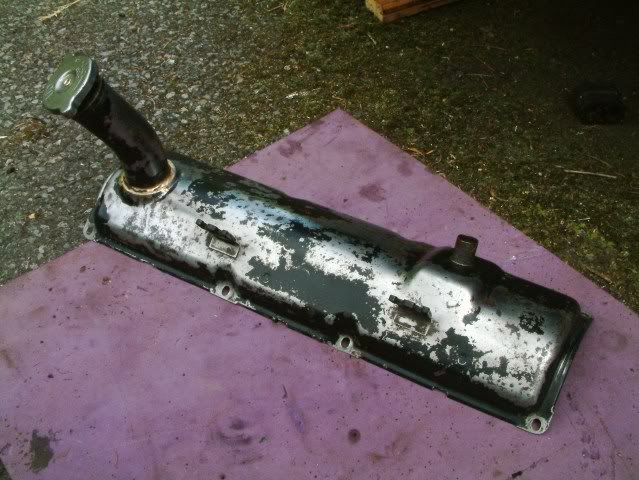
It's all refitted now. It started up and it runs. There was a teribble knocking noise which I found worryinf at first but it turned out to to be the plastic cam belt cover catching.on the alternator pulley. I didn't take photos of it, but I also swapped my alternator for an 80A Range Rover item. The old one always seemed to be working at full pelt to charge the leisure battery and run the van. On main beam the warning light used to glow slightly. It just needed the back half rotating through 90 degrees as it would originally have fitted on the opposite side to the Beddy. My drivers seat was a little worse for wear so I fitted this nice leather one from a Ford Scorpio 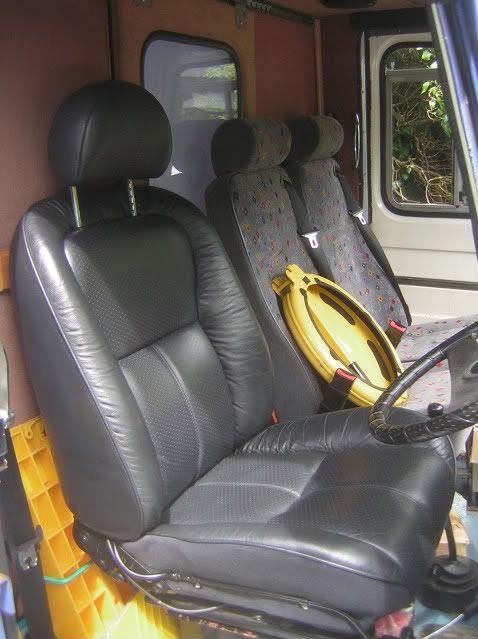

My previous seat was from a Sierra so it only took minor modifications to get this one on the old runner. All I need now's an MOT...... ---------------------- |
Sat 11 Jul 2009 @ 12:32
| |
|
Anon Deleted Posts : Location : Status : Offline |
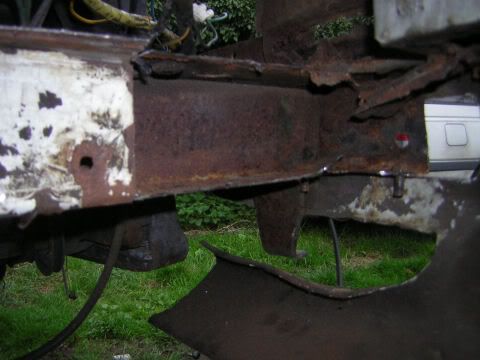
Wiper woes.... Since doing the head work and what have you in 2009, I haven't used the Beddy since.I took it for an MOT last year and it failed on low efficiency on a rear brake, welding needed on the front steps, main beam inoperative and the passenger wiper not working. I paid the Garage to do the welding as I didn't have the inclination to lie on my back getting showered in welding spatter and being an Ambulance it was in close proximity to lots of wood and fibreglass Cost a bit but at least it's done.
The brake was a sticky wheel cyliner so took it apart and cleaned it up and that's as far as I got. Never went back for a re-test. Decided it had to hit the road this year. The main beam issue was that the contact had snapped off in the switch. Couldn't find and original CF1 item for a reasonable price but got a CF2 one. Wiring's the same colours but it uses a different plug so I swapped them over using butt crimps. The wiper was more of a problem. The splines on the spindle had worn smooth and no matter how tight the nut was done up, the spindle turned in the hole on the wiper arm. There is no possible way I can see to access the wiper mechanism so it meant finding some sort of adaptor or finding a wiper motor that would mount above the screen in the void where the "Ambulance" sign would have been. I dicovered adaptors were available for Land Rovers to convert a peg type drive to a spline one. 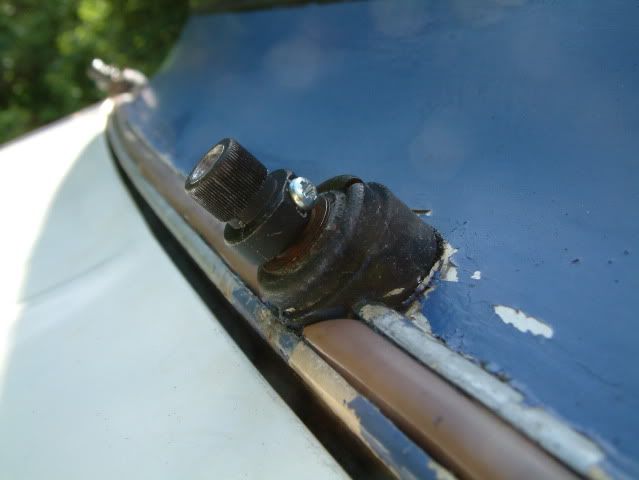
It's not a direct fit though. The centre had to be drilled out (10mm at bottom reducing to 8mm to allow for the shape of the Beddy spindles). 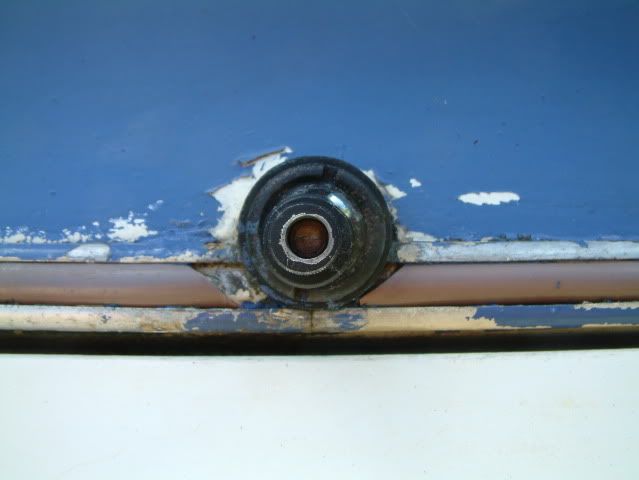
I was hoping the Range Rover wipers I have would fit as the arms are the right length but they don't! Different sized spindles. I ordered some Land Rover defender ones which fit the adaptors but are far too short. Time for some surgery..... Here's the difference. 
Had to disconnect the springs, drill out the retaining rivets on both arms and carefully bend out the metal that clamps the upper part to the base. This allowed them to be separated. 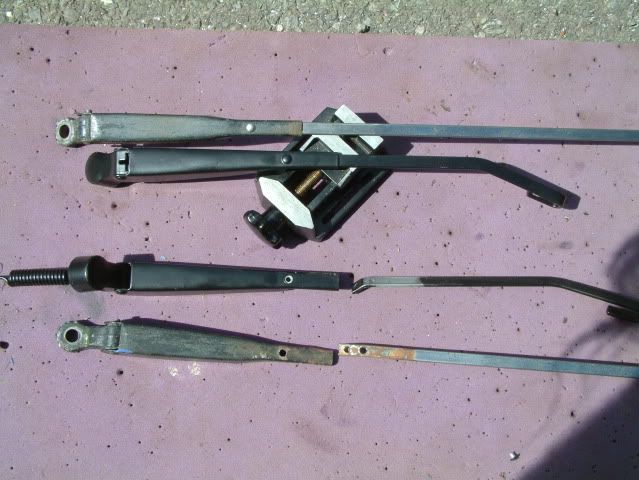
Then it's a matter of putting the longer Beddy arm into the Land Rover base, new rivet and a quick blow over with Satin black to tidy it up. 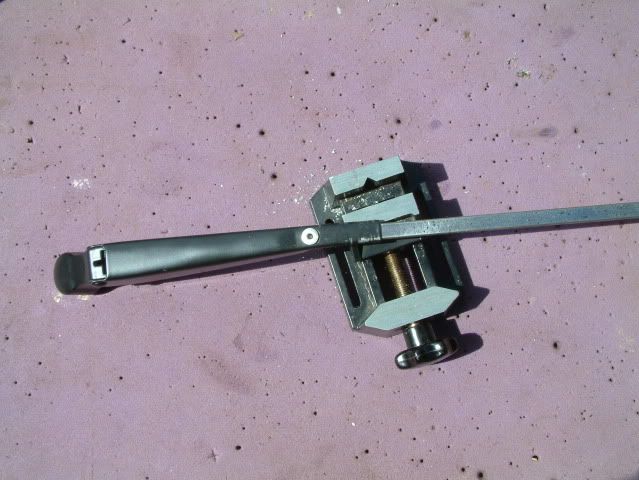
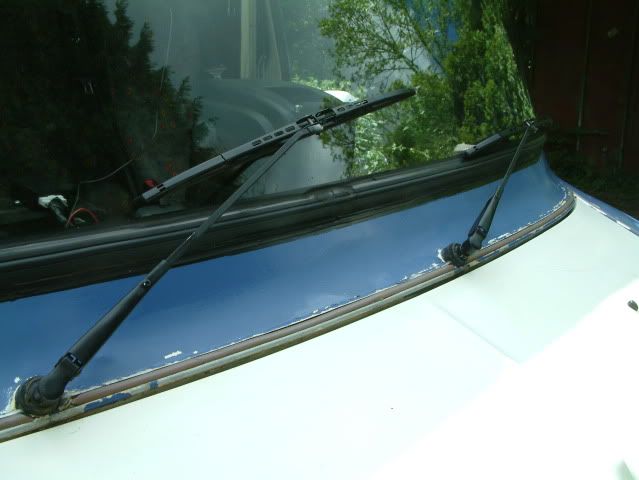
After fitting I discovered the grub screw supplied with the adaptors didn't quite hold. Drilled a small hole into the beddy spindles through the grub screw hole and used a small self tapper (see first pic). That seems to hold. Took it for MOT last week and it went straight through so I'm now back on the road 
---------------------- |
Mon 23 May 2011 @ 17:34
| |
|
Anon Deleted Posts : Location : Status : Offline |
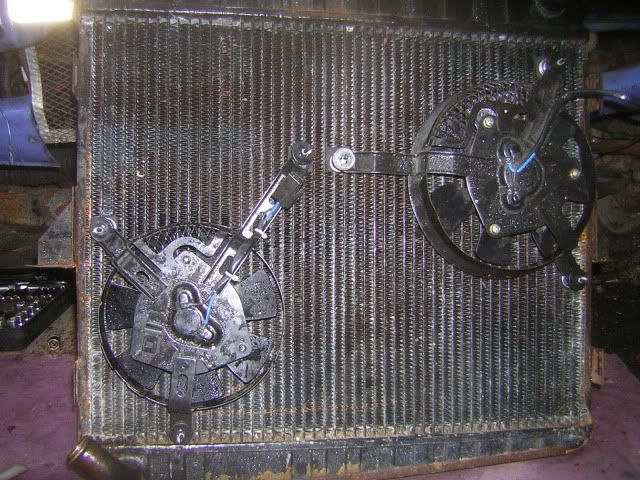
Here's the fitting of an electric fan as posted in the Hints and Tips section: Pair of bike fans, one larger than the other. I think these came as a pair and I can't remember what they're off but they were bought from ebay for under £20. 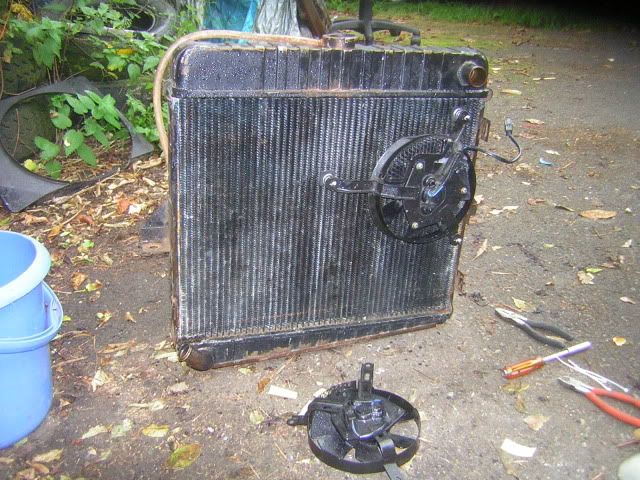
Mounted using through the rad mounts, these have a spring to help with vibration and foam pads to avoid damage to the rad. Another Ebay purchase, about a tenner I think, less than genuine Kenlowe ones. 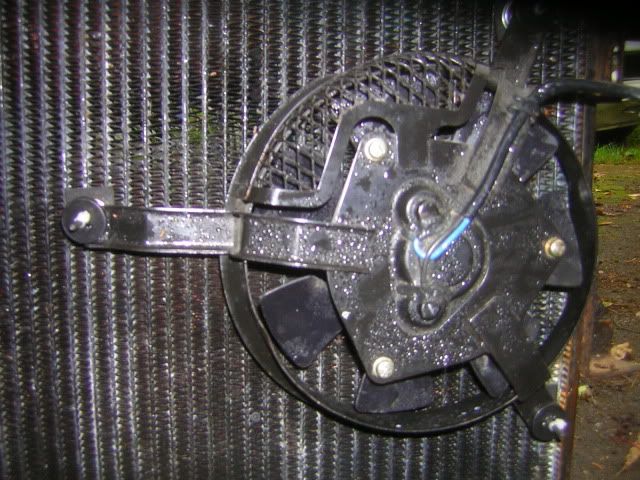
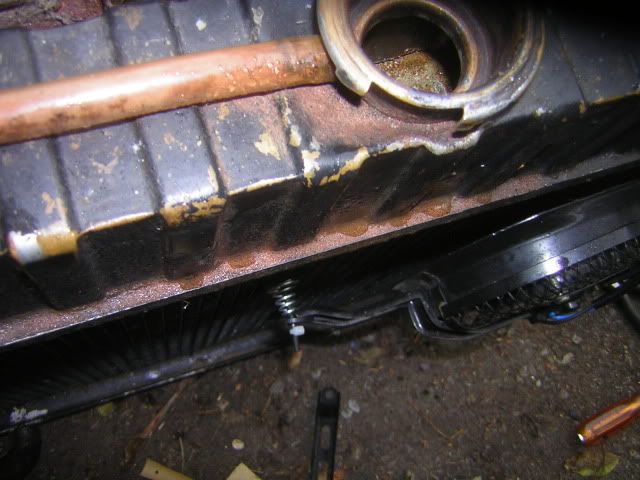

Mounted the larger one near the top inlet and the smaller one near the bottom outlet. This creates a gap in the middle and gives clearance for the pulley. 
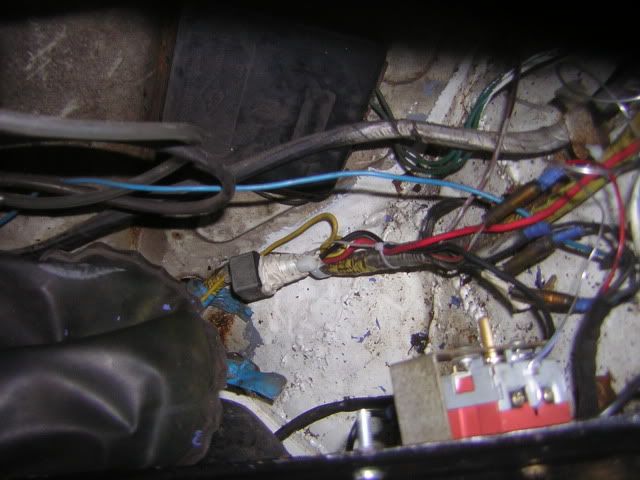
Already had some fans I'd fitted to my old Range Rover so stripped the wiring and adjustable thermo switch form that. It's wired through a relay just visible top right. 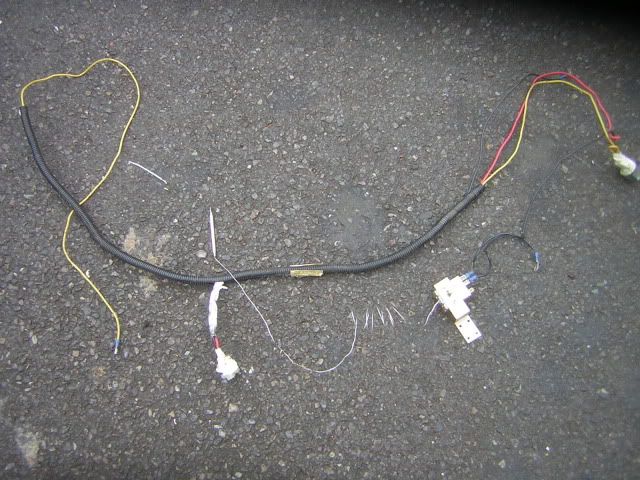
Wiring and switch in place. Mounted behind the triangular brace next to the headlamp mounting to protect it from the weather. Relay cable tied to the existing loom and tucked into the corner for weather protection. 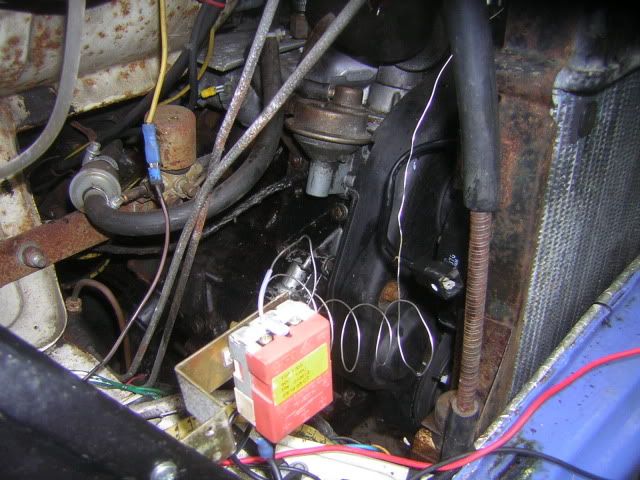
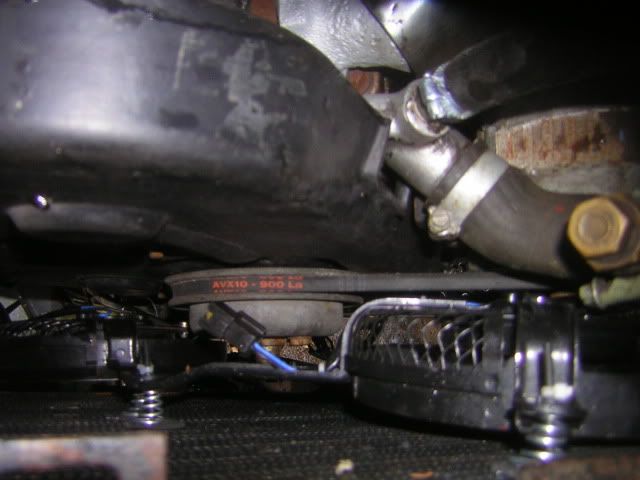
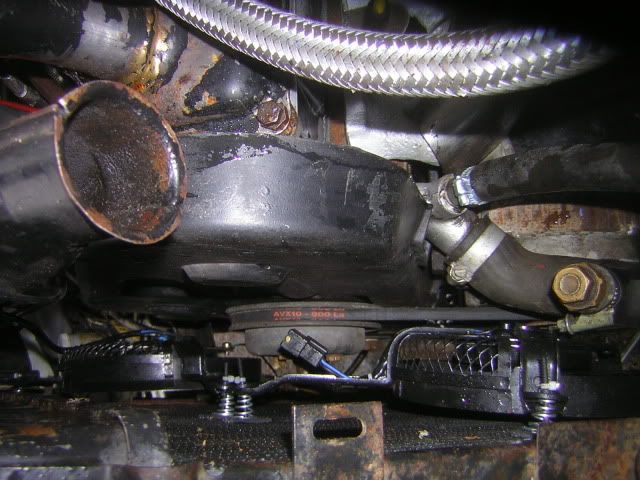
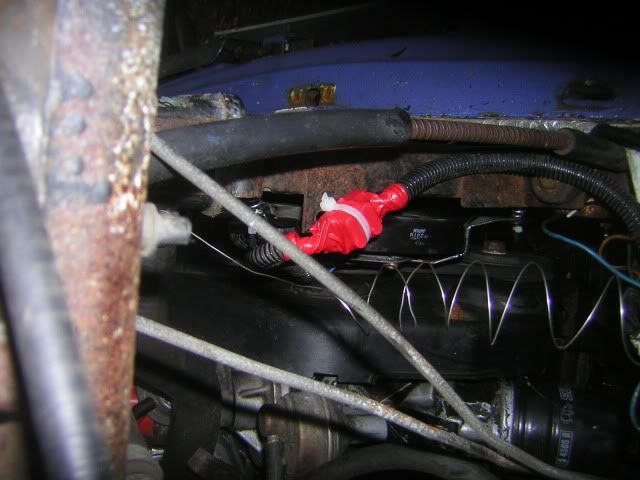
The switch is quite expensive but being adjustable it allows you to decide when you want it to cut in, it's also easy to fit as the probe on the end of the long wire slips inside the top hose and you just tighten the jubilee clip. It doesn't leak. They also sell a fitting kit but I just used wire and a metal cased VW headlight relay I had in my spares stash. http://www.s-v-c.co.uk/product/thermostatic-fan-switch/ http://www.s-v-c.co.uk/product/pacet-fan-wiring-kit/ Wire it to an ignition dependent feed, through a 20A inline fuse. If you wire it to a permanent live or straight to the battery, the hose heats up when the engine is turned off and the fan kicks in. Because the coolant isn't pumping round the fan runs for ages and will potentially drain the battery. Mine is connected to the live feed from the ignition switch. Everything tidied up and protected. Shows just how tight things are 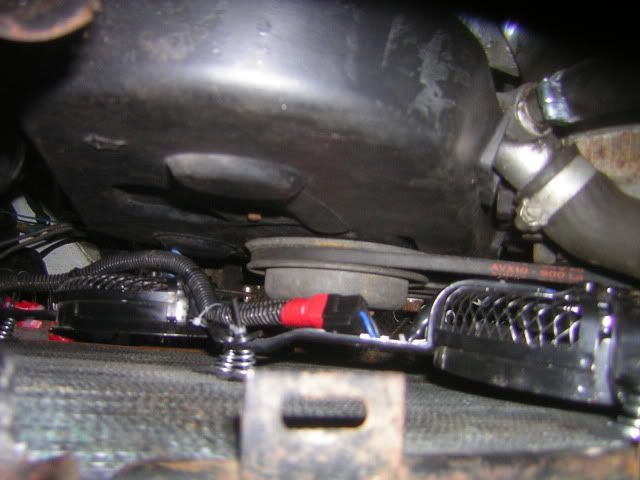
---------------------- |
Mon 23 May 2011 @ 17:37
| |
| Time in GMT | |
| [Post Reply] | |
 New posts since your last visit New posts since your last visit |
Administrative Functions: Open/Close/Delete Thread / Move Thread |
 Old post Old post |
Back to the CF-UK Homepage ][ Email CF-UK
Powered by FunkBoard vCF0.74c